The Power of Shooting with One Light and a Reflector
The Power of Shooting with One Light and a Reflector
The Power of Shooting with One Light and a Reflector
In this article, I’ll give the virtues and benefits of shooting simply, with only one light and a reflector.
Lighting is often perceived as a complicated beast, but does it have to be? Sure, in terms of technical aspects, there’s an awful lot to learn before you can truly master lighting. There are also plenty of techniques that involve numerous light sources at various power outputs, rigged together with any number of modifiers.
But are these necessary? If you want to learn every aspect of lighting inside and out, then the answer is yes. However, when you are a beginner, I would argue that it’s far too easy to get bogged down in those complications when in reality, you could conceivably go an entire photographic career without touching them.
One light
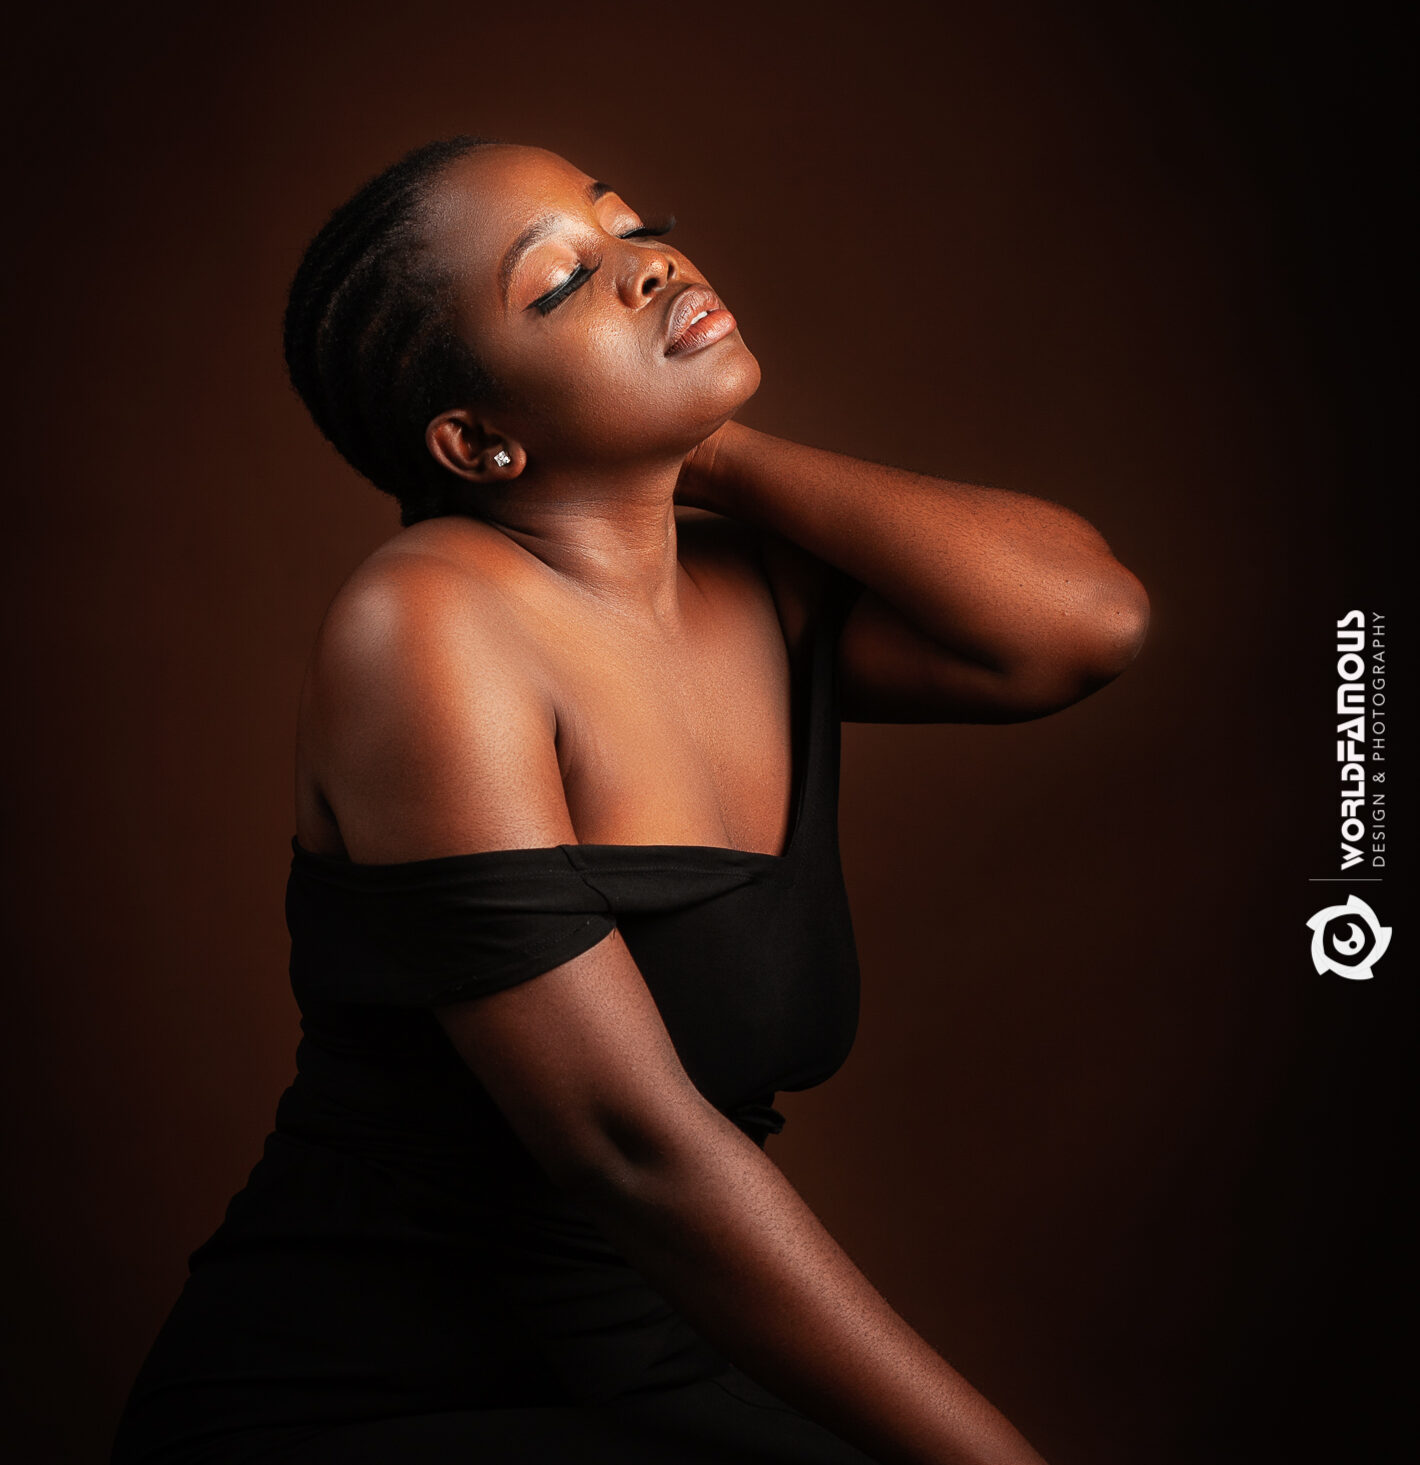
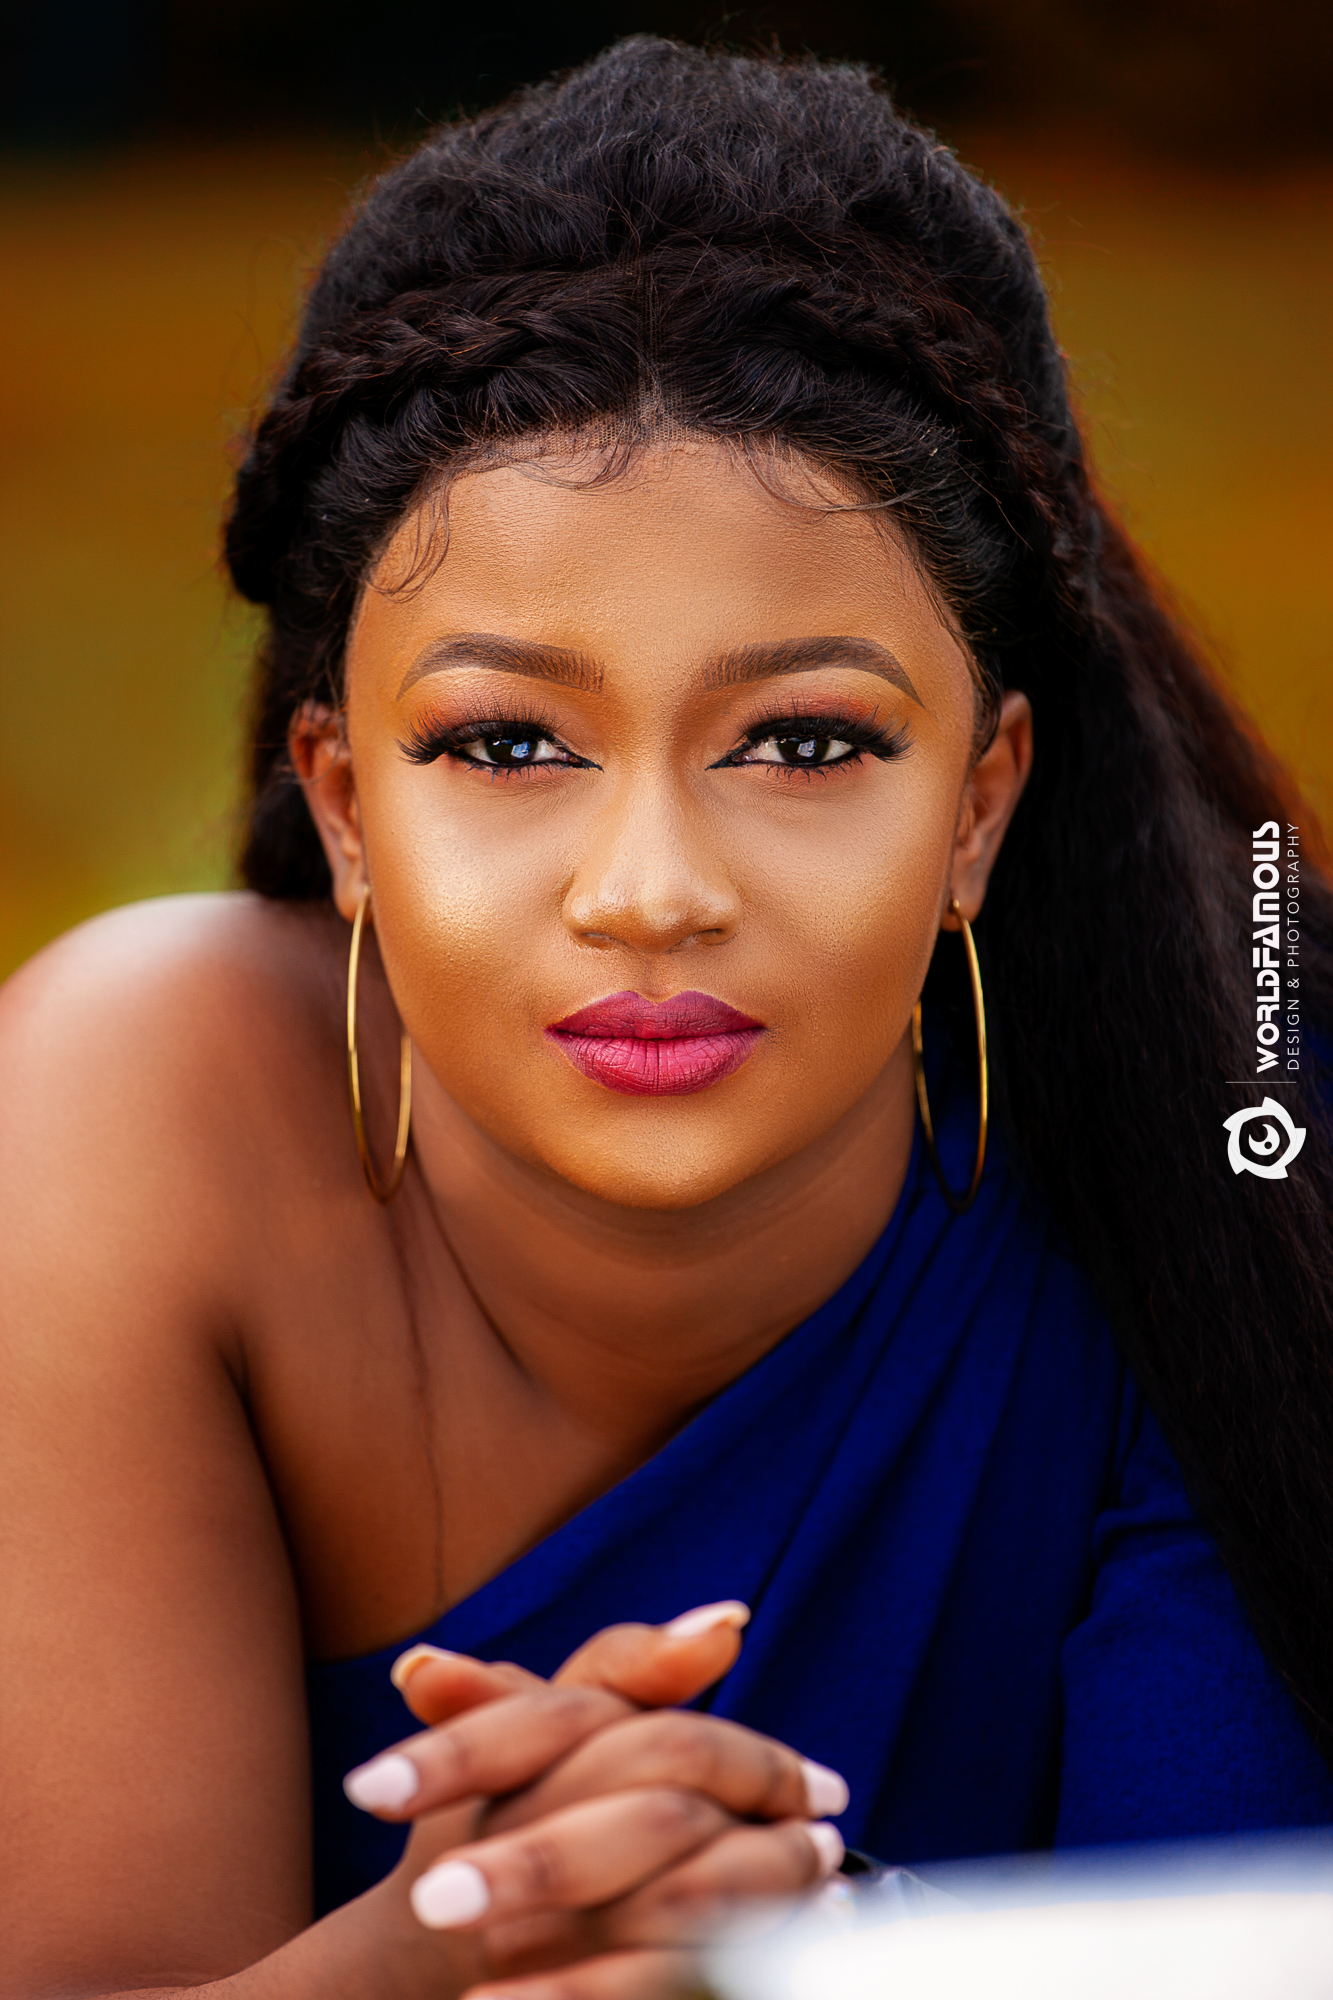
With a single light source and a reflector for fill, you have enough creative options in terms of lighting that you could go an entire lifetime with nothing more and still fill a diverse and varied portfolio. Technically the reflector is a second light source if you want to get into that, but it’ll be referred to as a reflector for our purposes here.
You may not want to and it’s more than likely that once you’ve got the basics of lighting down, you’ll want to dive deeper and deeper until you get to those ultra complicated set-ups, but it is possible. One light set-ups can give you both dramatic, shadowy photos which ooze mood as well as bright, cleanly lit images with plenty of detail throughout.
On top of that, there’s only one light to set up, only one light to modify and only one light to meter. If you’re working with limited time, say 20 minutes to set up, take a few shots and get out of there.
Four, five and six light set-ups just aren’t going to be an option. Of course, it’s also a whole lot easier to lug around one light then it is to take five.

What you need to know
Key Light – The key light is your main light source. In these instances, it’s the actual strobe. It could just as easily be any other type of light source such as a window or a street light. This is the main light that you will be shaping your subject with.
Fill Light – In these examples, the fill light is the job of the reflector. When placed opposite the key light, the reflector bounces light back onto your subject and fills in the shadows. This helps to reduce contrast and also tends to lead to more flattering images of human subjects. A fill light does not have to be a reflector. Again, it could be any light source that acts independently of your key light to fill in shadows on your subject.
Reflector
Get a good sized (32″ or 42″) cheap one and take it everywhere. Don’t be too precious with it and let it get dirty, battered and warped through use. They’re easily replaced.
If you don’t want to buy one, reflectors are pretty easy to make. White foamcore, posterboard, cardboard painted white, or a styrofoam insulation are all easily turned into reflectors.


Conclusion
In terms of variations on these techniques, this article hasn’t been anywhere near comprehensive. Honestly, using a single light and a reflector will give you an infinite variety of techniques to use in your photography.
When you’re starting out, I strongly encourage you to explore these as much as possible before moving on to more complicated set-ups as you may find, that most situations would benefit from the simplicity.

Fusce aliquam tincidunt hendrerit. Nunc tincidunt id velit sit amet vestibulum. In venenatis tempus odio ut dictum.
Curabitur ac nisl molestie, facilisis nibh ac, facilisis ligula. Integer congue malesuada eros congue varius. Sed malesuada dolor eget velit euismod pretium. Etiam porttitor finibus pretium. Nam suscipit vel ligula at dharetra.
Build an elegantly modern, responsive website that’s creative, accessible and beautifully presented. A well-designed website can change your conversion and a profit for good.
WORLDFAMOUS!
Pls can often update us more about Onelight Seup
This is awesome